Procrastination is the enemy of all wargamers and I suffer from it, the maybe tomorrow I’ll get this finished syndrome. Part of the reason that I started this blog was an attempt to push myself into the virtual corner so that I committed to get things done. It’s a bit early to see if that has worked. I started my new dirt roads over 6 months ago and it stalled as I got side tracked onto other projects or work/life got in the way.
I learnt this particular method from one of the other members of my local wargaming club, for those interested I have been a member of the Nunawading Wargames Association since I moved from Brisbane to Melbourne almost 5 years ago.
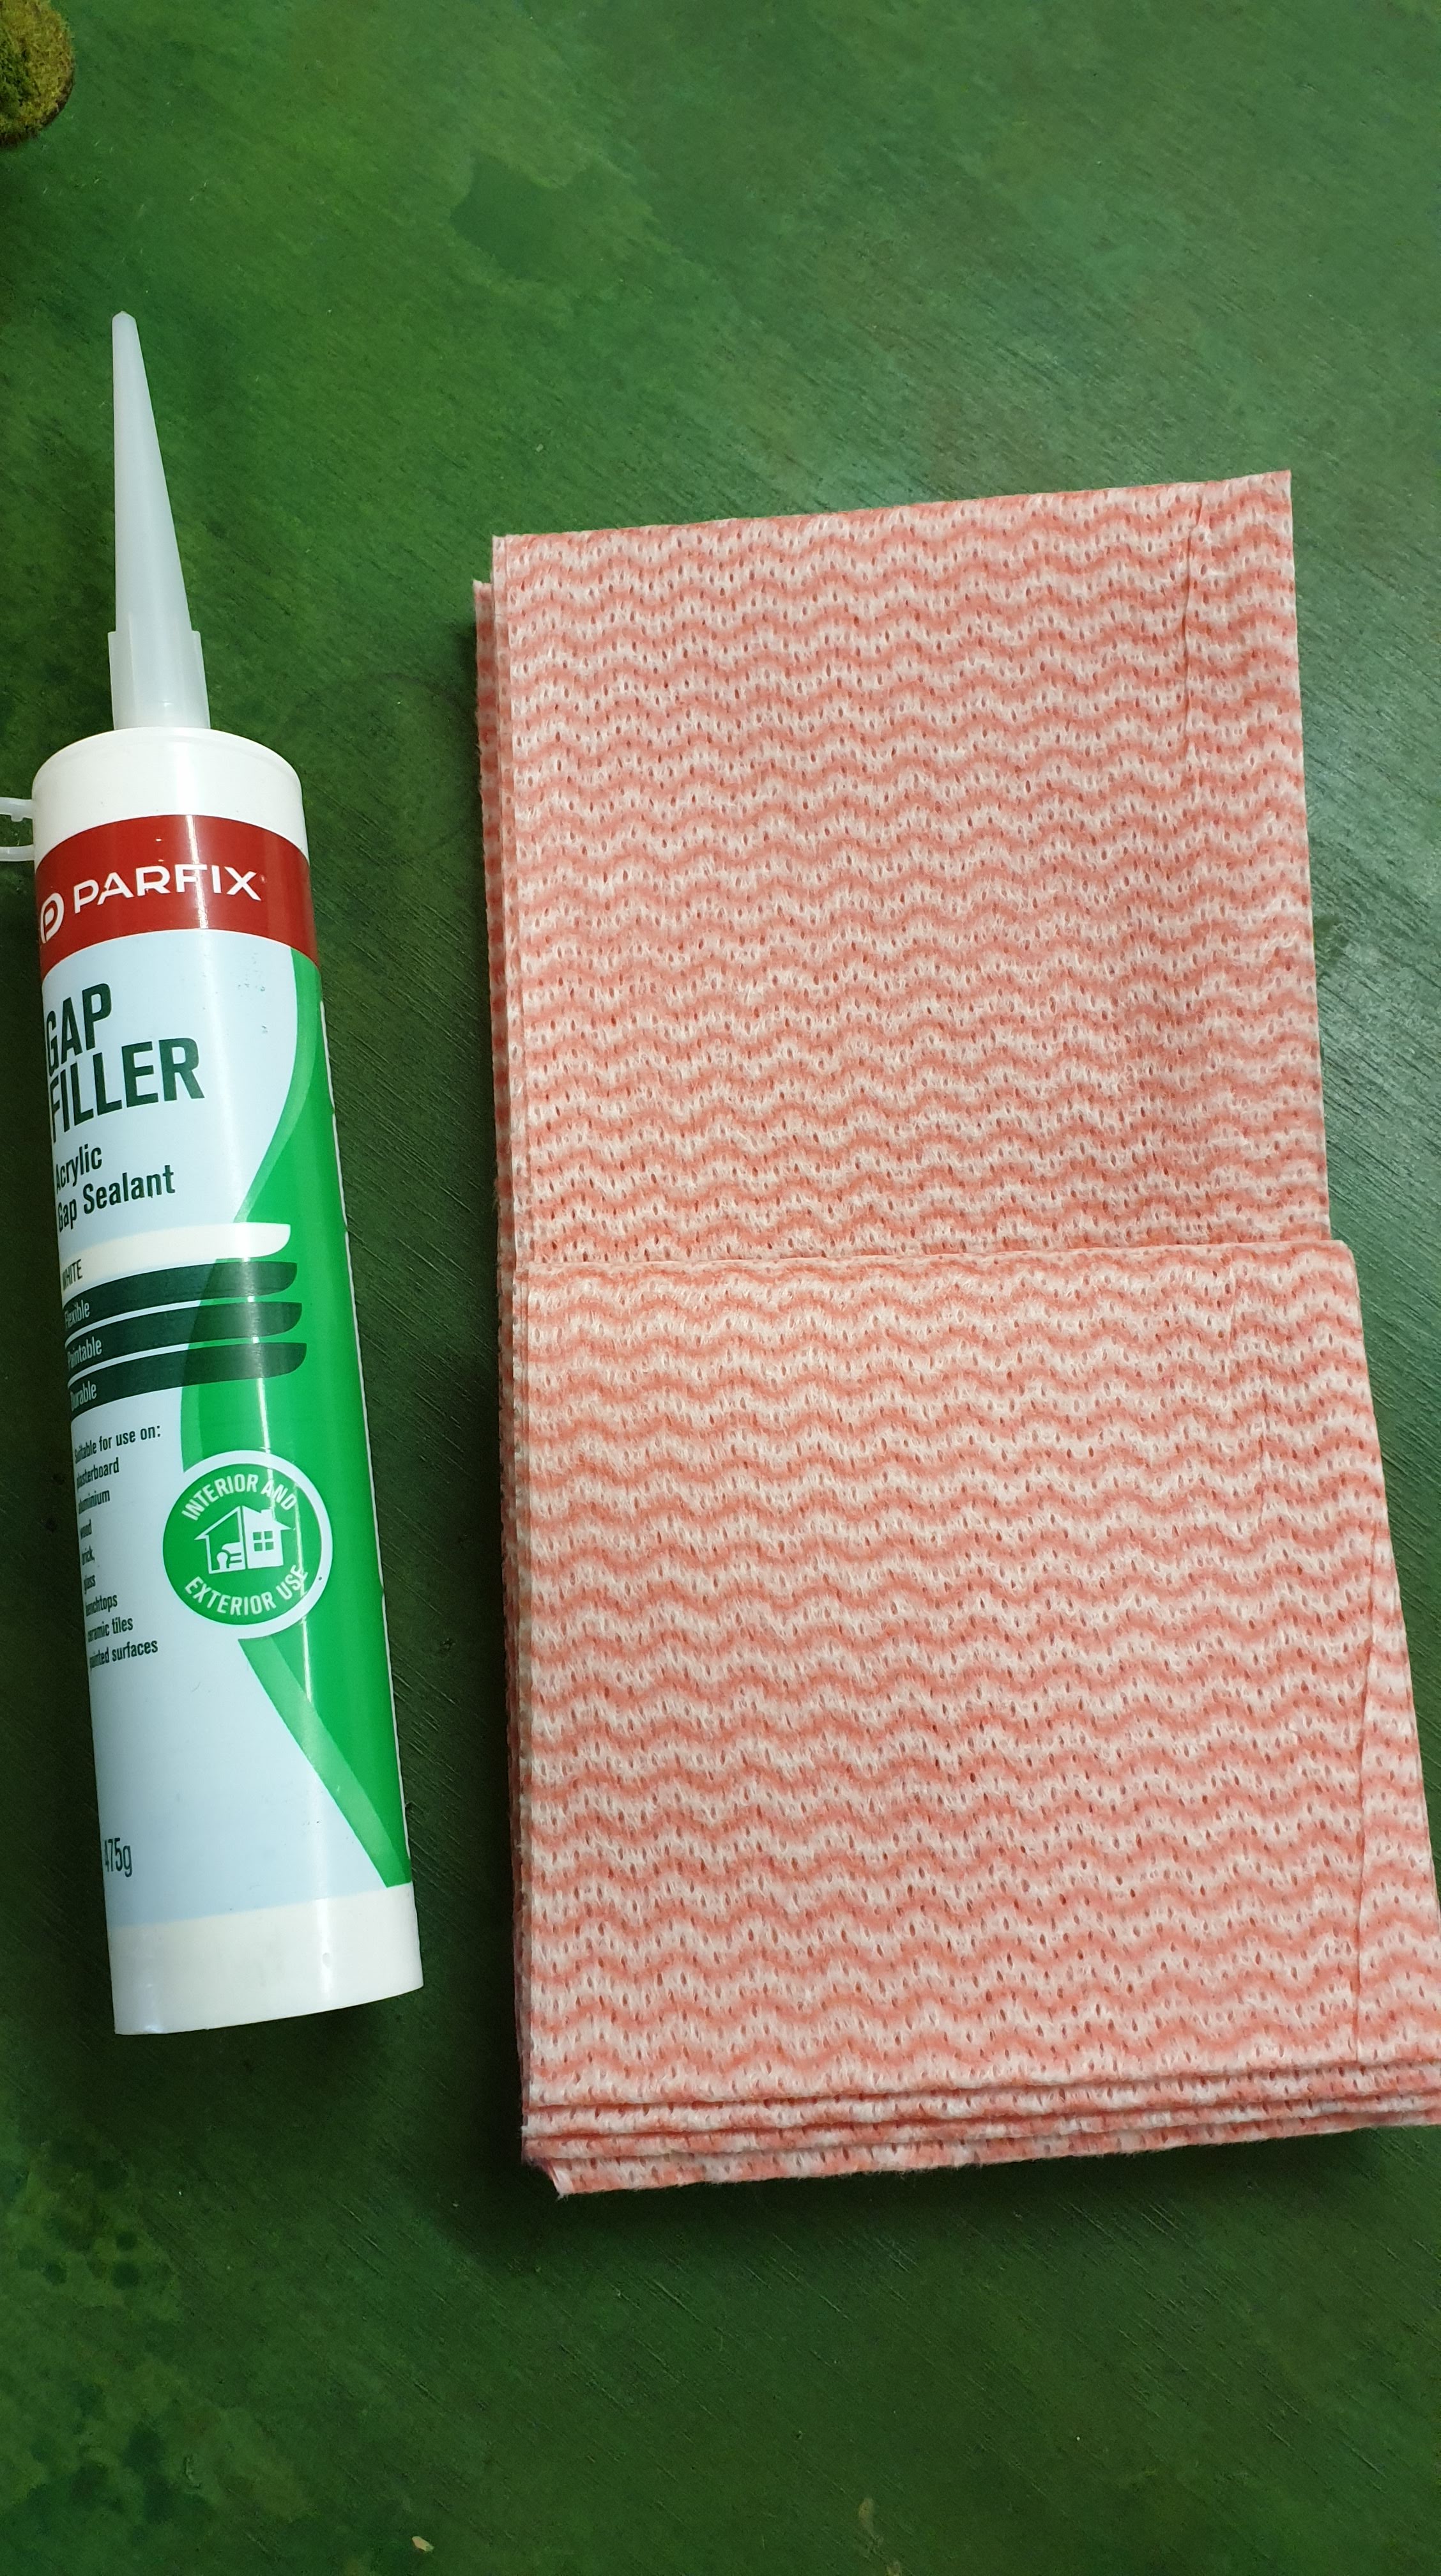

Neil showed me his roads that he made a couple of years ago from what we call in Australia, Chux Cloth and cheap water based calking compound. I was very surprised as they are very hard wearing and flexible to boot. 6 months ago I re-purposed a pack of chux that my wife had bought during the weekly shopping and I had a bunch of very cheap calking compound that I bought from our local hardware superstore (Bunnings) that was left over from another project.
I learnt from a previous project that the real success was not putting the compound on in one thick layer but rather spread a thin layer on first to fill the fibers and create a layer that the thicker top layer could bond to more successfully and the end result was more flexible.
I used 4 tubes of calking compound to create the base for the roads and after they had dried I cut them into the various shapes with dressmakers scissors, it handled like thin rubber, which is what it was I suppose.
That was 6 months ago, they stayed in limbo until last week. My old roads where made of 3mm ply and for some reason warped. However I was never particularly fond of them but never really got around to making replacements as they were good enough. We used them during a series of WWII Malaya games and both me and my long suffering opponent John got rather annoyed with them as they never sat right and to be honest looked a bit amateurish.

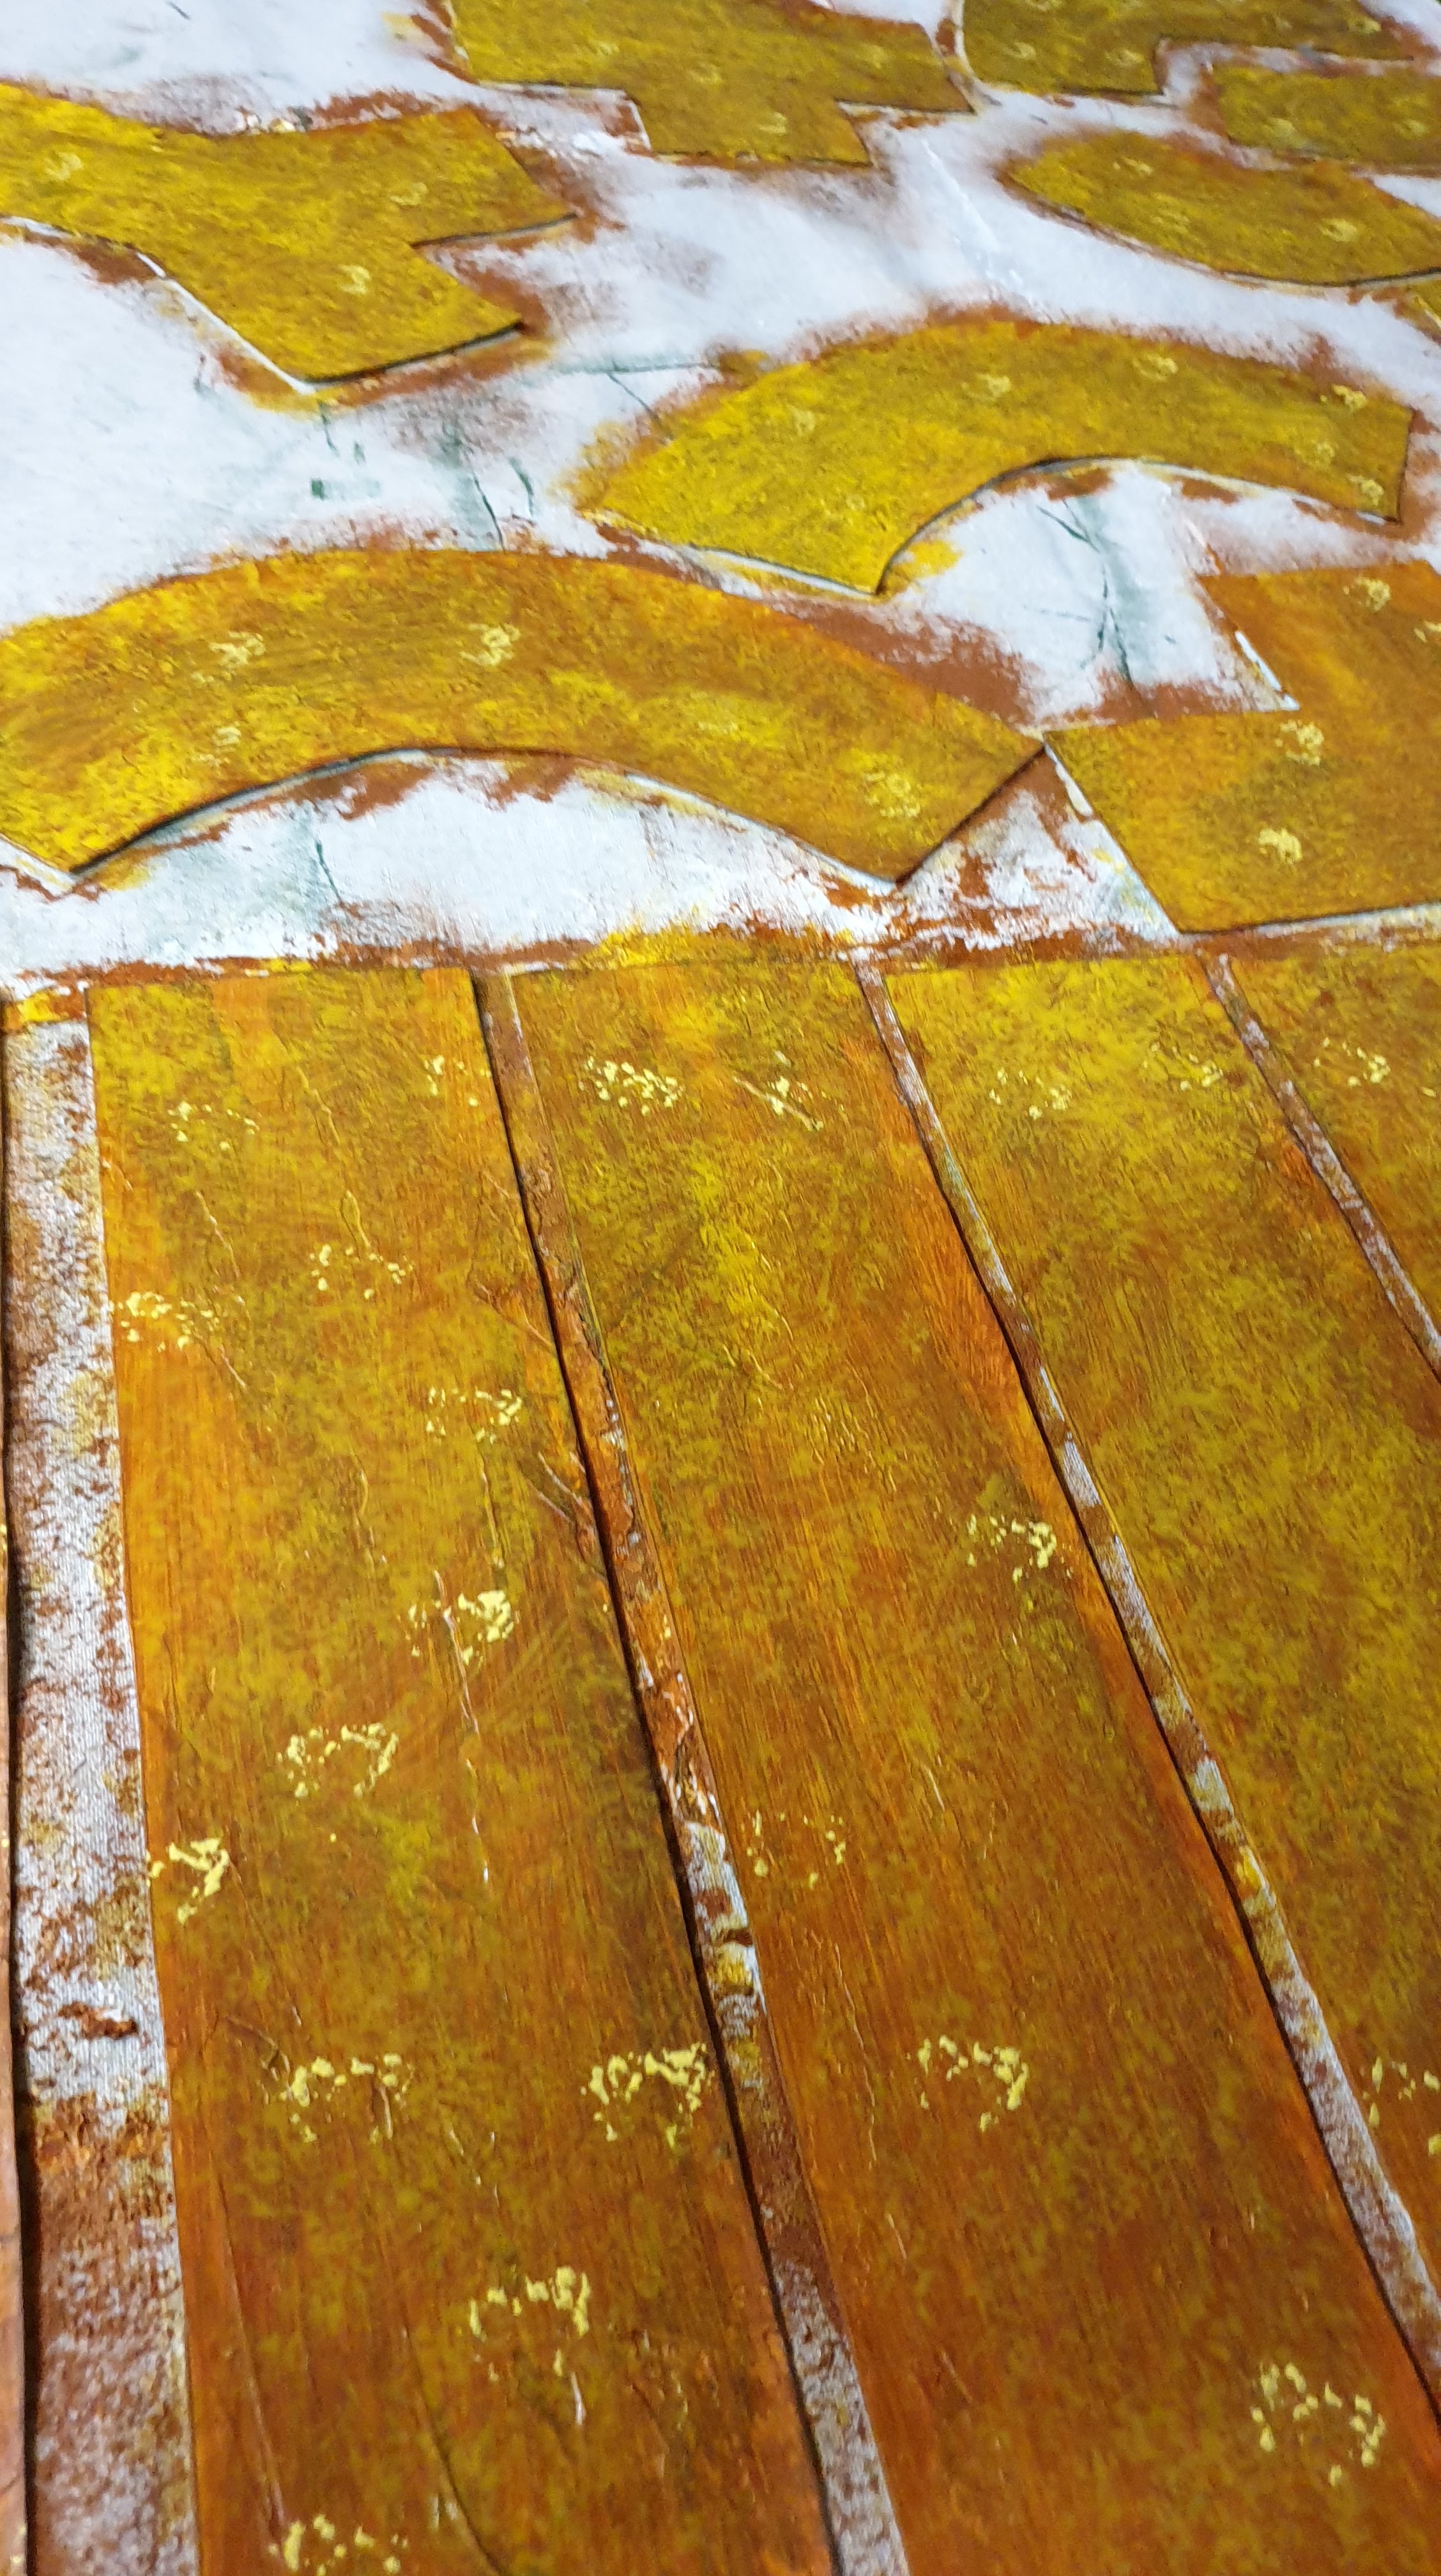
On Christmas Day I dragged them out of storage while the rest of the family lay in a food coma and started to paint them. Unfortunately family commitments dragged me away from them until today when I was able to return and finish the painting and flocked the edges and such.

The other measure of success is cost. Commercial road systems can cost rather a lot of money. I built about 6 meters of road in 28mm scale for about 25 dollars not including my time which was roughly 7 hours. The packet of Chux was $3.00. The calking compound was $3.50 per tube, I used the cheapest I could find, and I used 4 tubes so $14.00. I used cheap artists acrylics at $3.00 per tube and I went through 2 tubes – $6.00 and a very small amount of flock, maybe 2 dollars.

Total painting time was about 3 hours. If I had started and worked until the job was done the total time was about 7 hours, not including drying time for the calking compound. I think there is a lesson here. Will I learn from it, I hope so!!
I am fairly happy with the end result and will use the same technique to make a modular cave system for my kids D&D campaign and some tarmac roads for some reason that I will justify later. It occurs to me that I could use a stamp to impress cobble stones into the calking compound while it is still wet, something to ponder on. Hopefully I will get these done fairly quickly, at least quicker than this lot!

I’d be keen to see any sort of stamp you put together.
LikeLike
Hi Geoff, Apparently Neil has done one already, I will have a look at it and see if I can replicate it!
LikeLike
So you covered the cloths with one layer 1st then when dried cut to shape then applied a 2nd layer is this correct?
LikeLike
Hi Jeff! Long time between chats. No I layered the entire sheet twice before I cut it. that way you keep nice clean edges (if that is what you are after) make sure the second layer is fairly thick. Even the thicker sheets cut easily with a decent pair of scissors
LikeLike
I cut the base of an infatryman and made him walk up and down the road edges 1cm in by 1cm wide both directions pushed some small rocks in along the edges and ran wheels along middle and imprinted tank tracks also, then sprinked sand sparsly across top randomly, before painting with spray undercoat. have not started dry brushing yet practised with different medium glad wrap edges curled, some plastic sheeting shrank and yesterday calico this was best as heavier and sits flat better than others.
LikeLike
can you post some photos? The curling is caused by uneven drying, I’ve found the best way to fix the curling problem is to paint the other side with some very watery paint. when it drys it shrinks to almost flat.
LikeLike
Hi Leith I did photos how do I send/attach them?
LikeLike